You can download the new TireMinder Lite App for your Smart TPMS from the Apple App Store here:

BEFORE YOU START
Before beginning setup of your TireMinder Smart TPMS, please be sure to fully charge your Bluetooth Adapter. A significant charge may be needed before the unit is ready to be used. You can check its battery level in the Settings on the TireMinder Lite App, and scrolling down to the bottom.
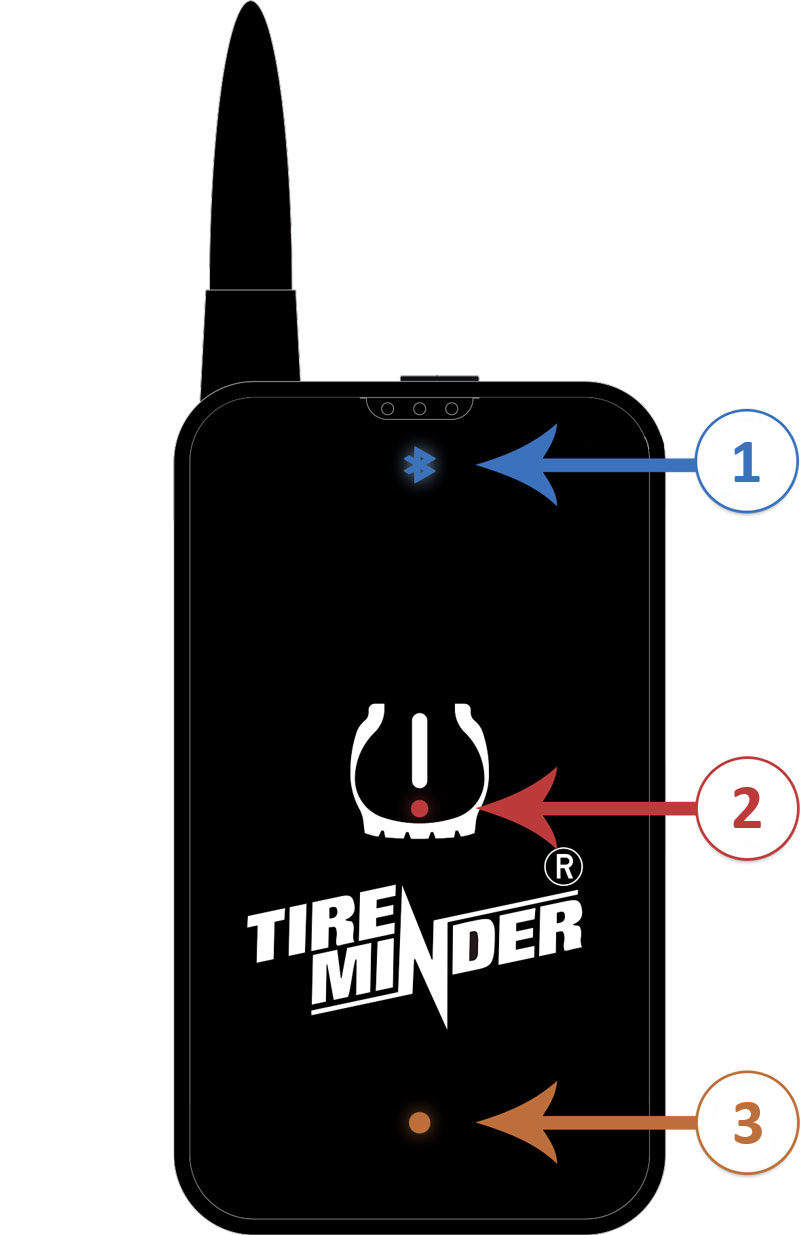
- Bluetooth Light - Blinking when connected; Solid when not connected
- Alert Light - Blinks when tire issue occurs
- Battery Light - Blinks on low battery; solid while charging; disappears when fully charged
When you're ready for setup, please be sure to have your Bluetooth Adapter turned on and near you, i.e. in your pocket or in your hand. Bluetooth has a maximum range of 30 feet, or 10 meters, so take care to keep it nearby.
SETTING UP
HOME SCREEN
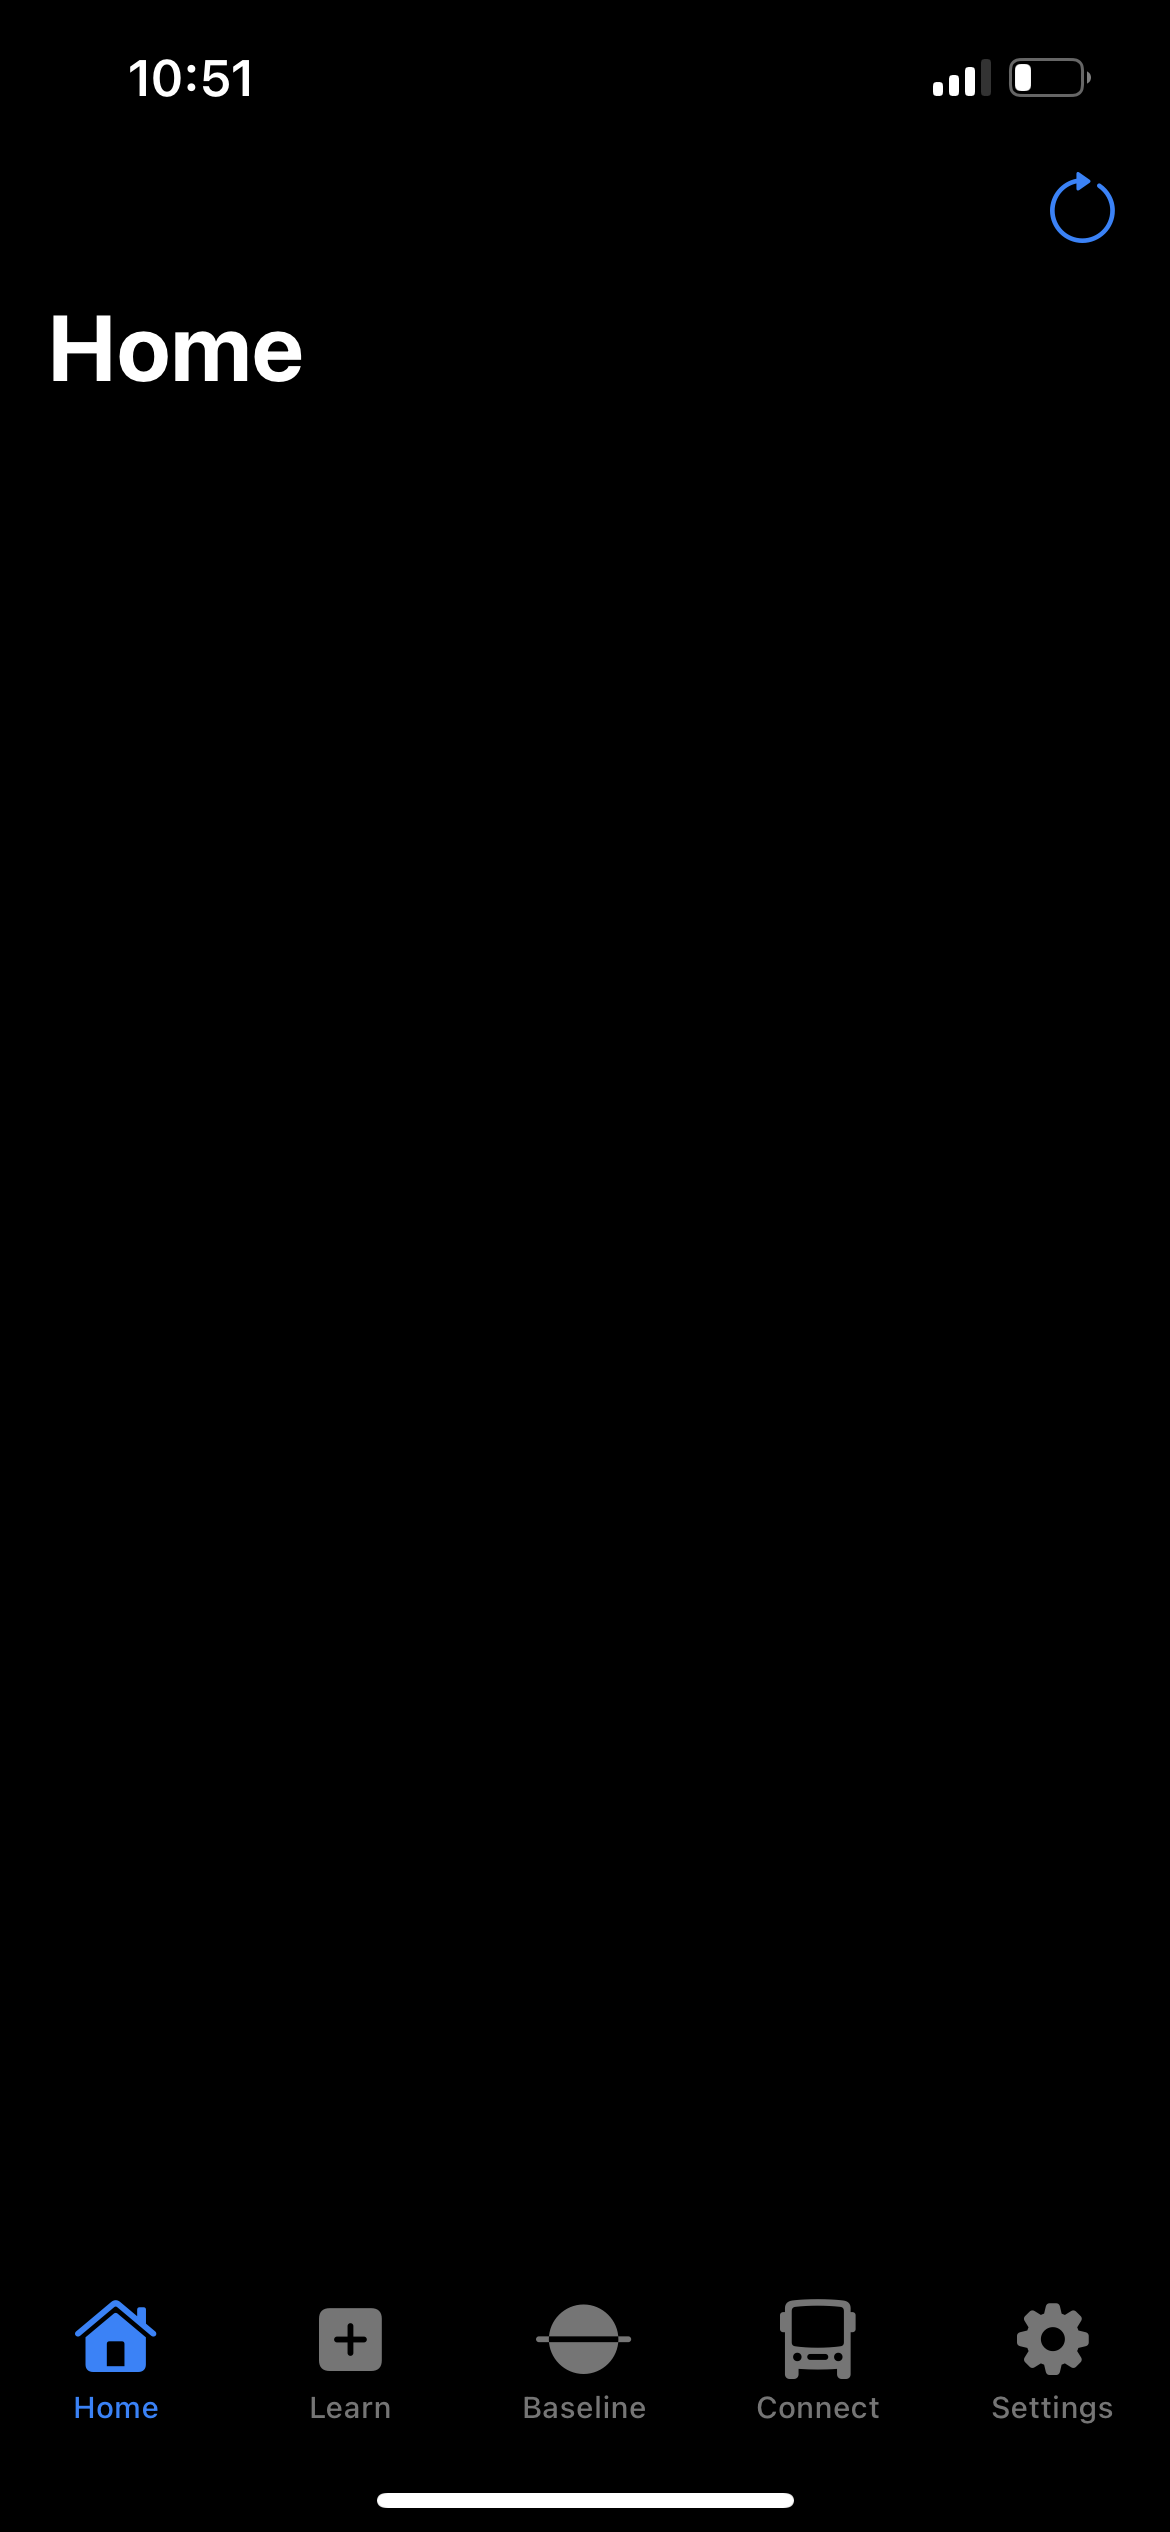
Upon first launching the TireMinder Lite App on your iPhone or iPad, you'll be taken to the Home screen, which is the main screen where monitoring is done after the Learn Mode process is complete.
You'll first be presented with the following screen, where you'll be informed that your Bluetooth Adapter or A1AS monitor must be turned on in order to begin using the TireMinder Lite App.

After turning your Bluetooth Adapter or A1AS monitor on, you'll be presented with a blank Home Screen, seen below.
LEARN MODE
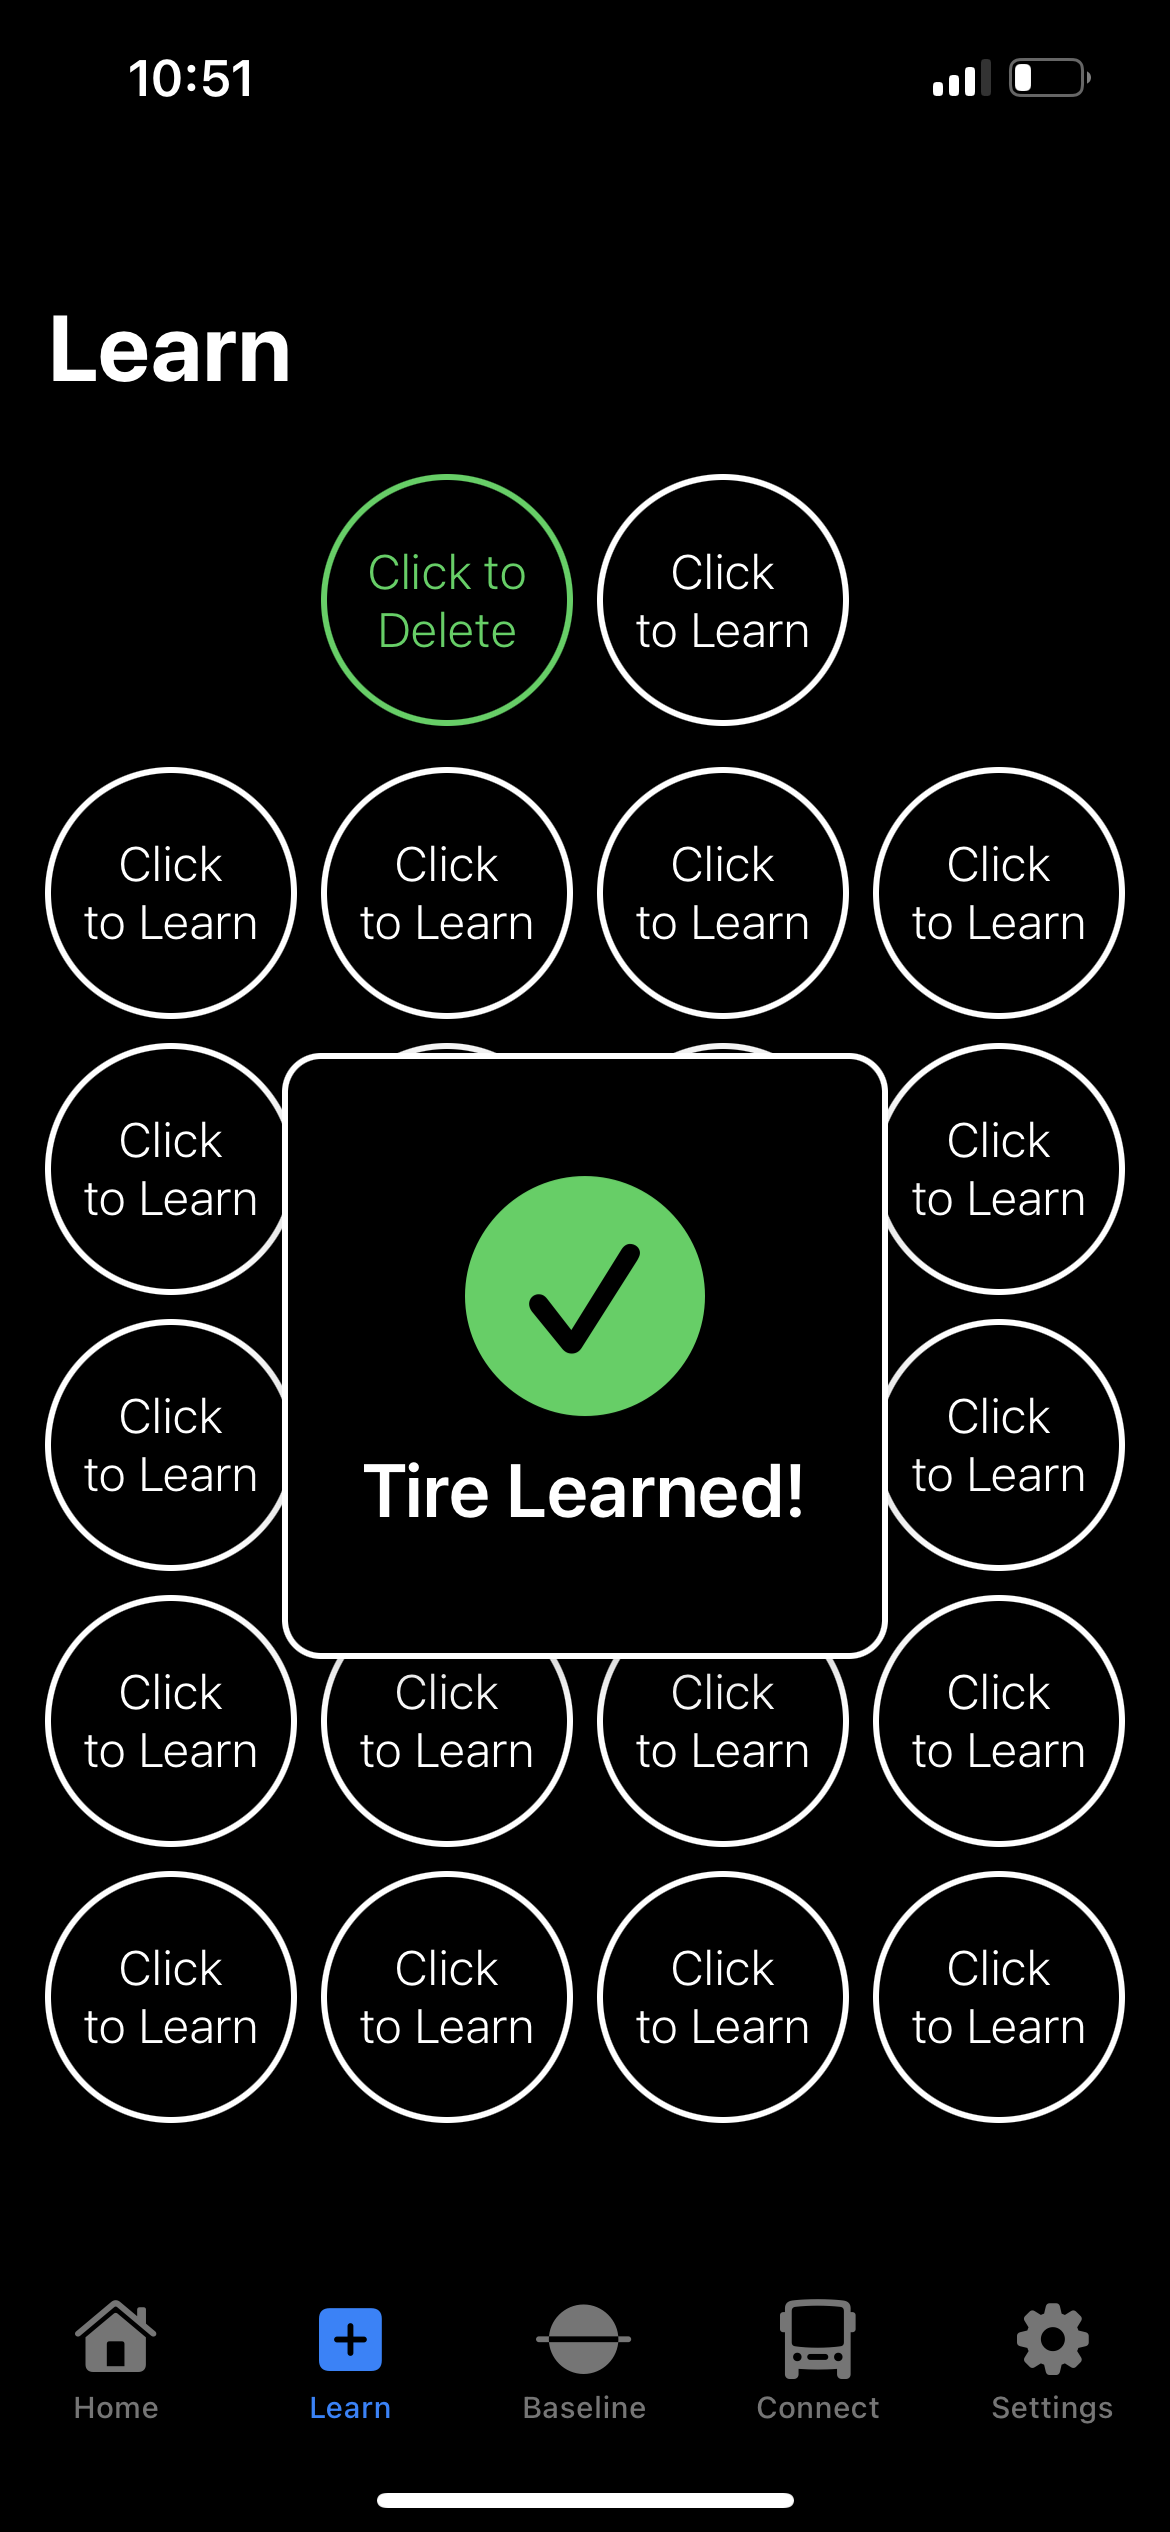
Learn Mode is where you'll begin learning your transmitters to your system. You'll first see the Learn Mode layout as it appears below.
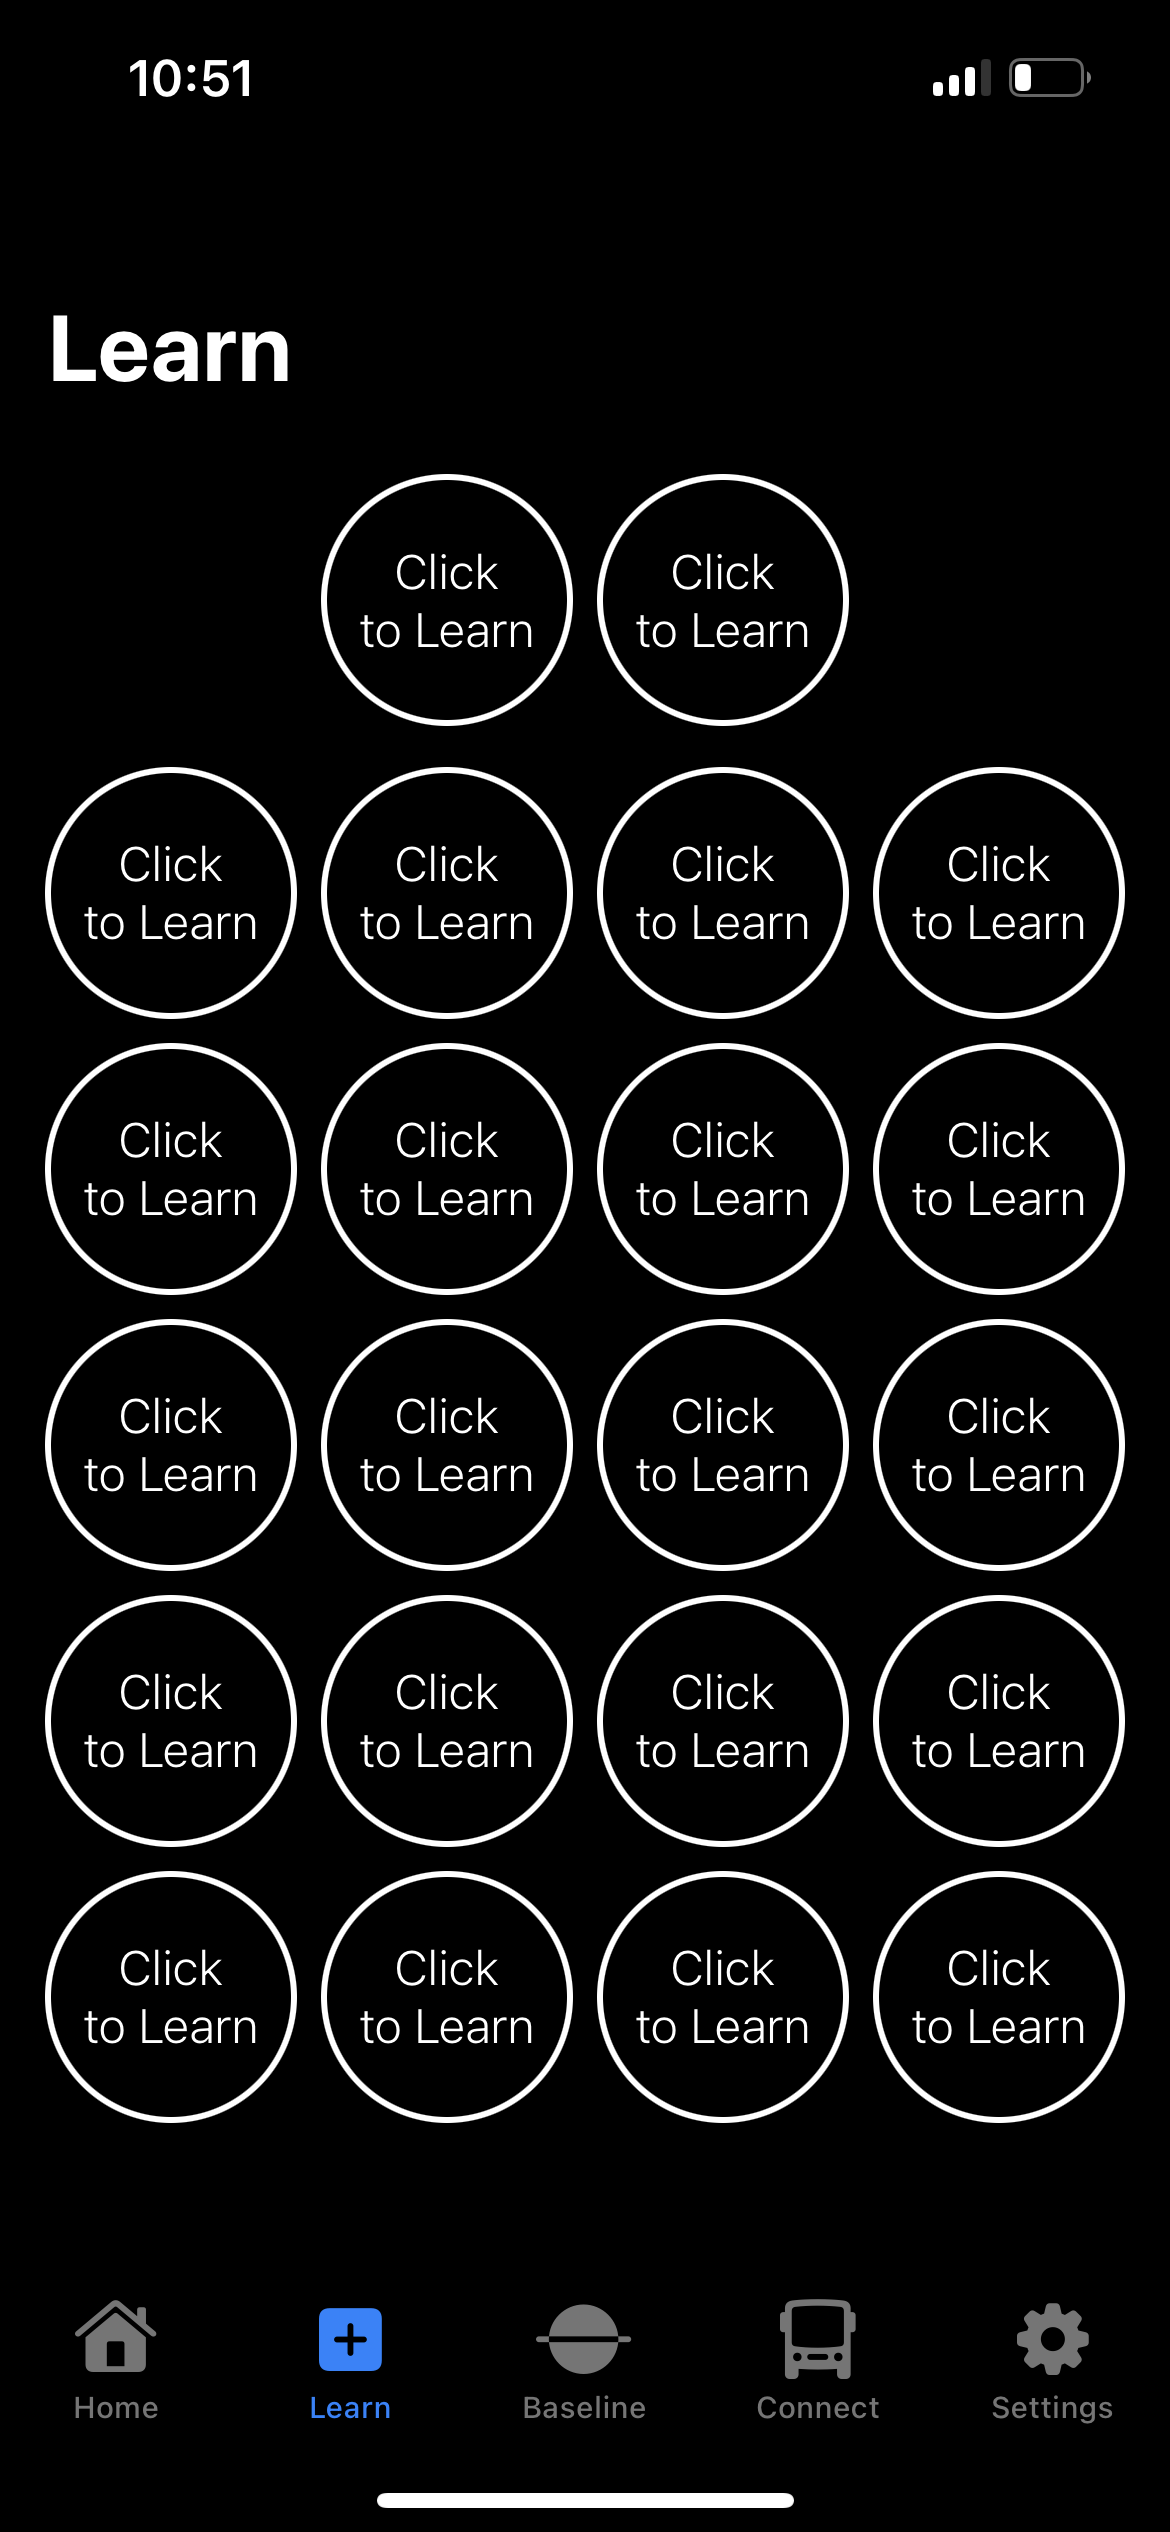
You may then begin learning your transmitters by tapping the tire position you wish to learn the transmitter to, and selecting "Confirm."
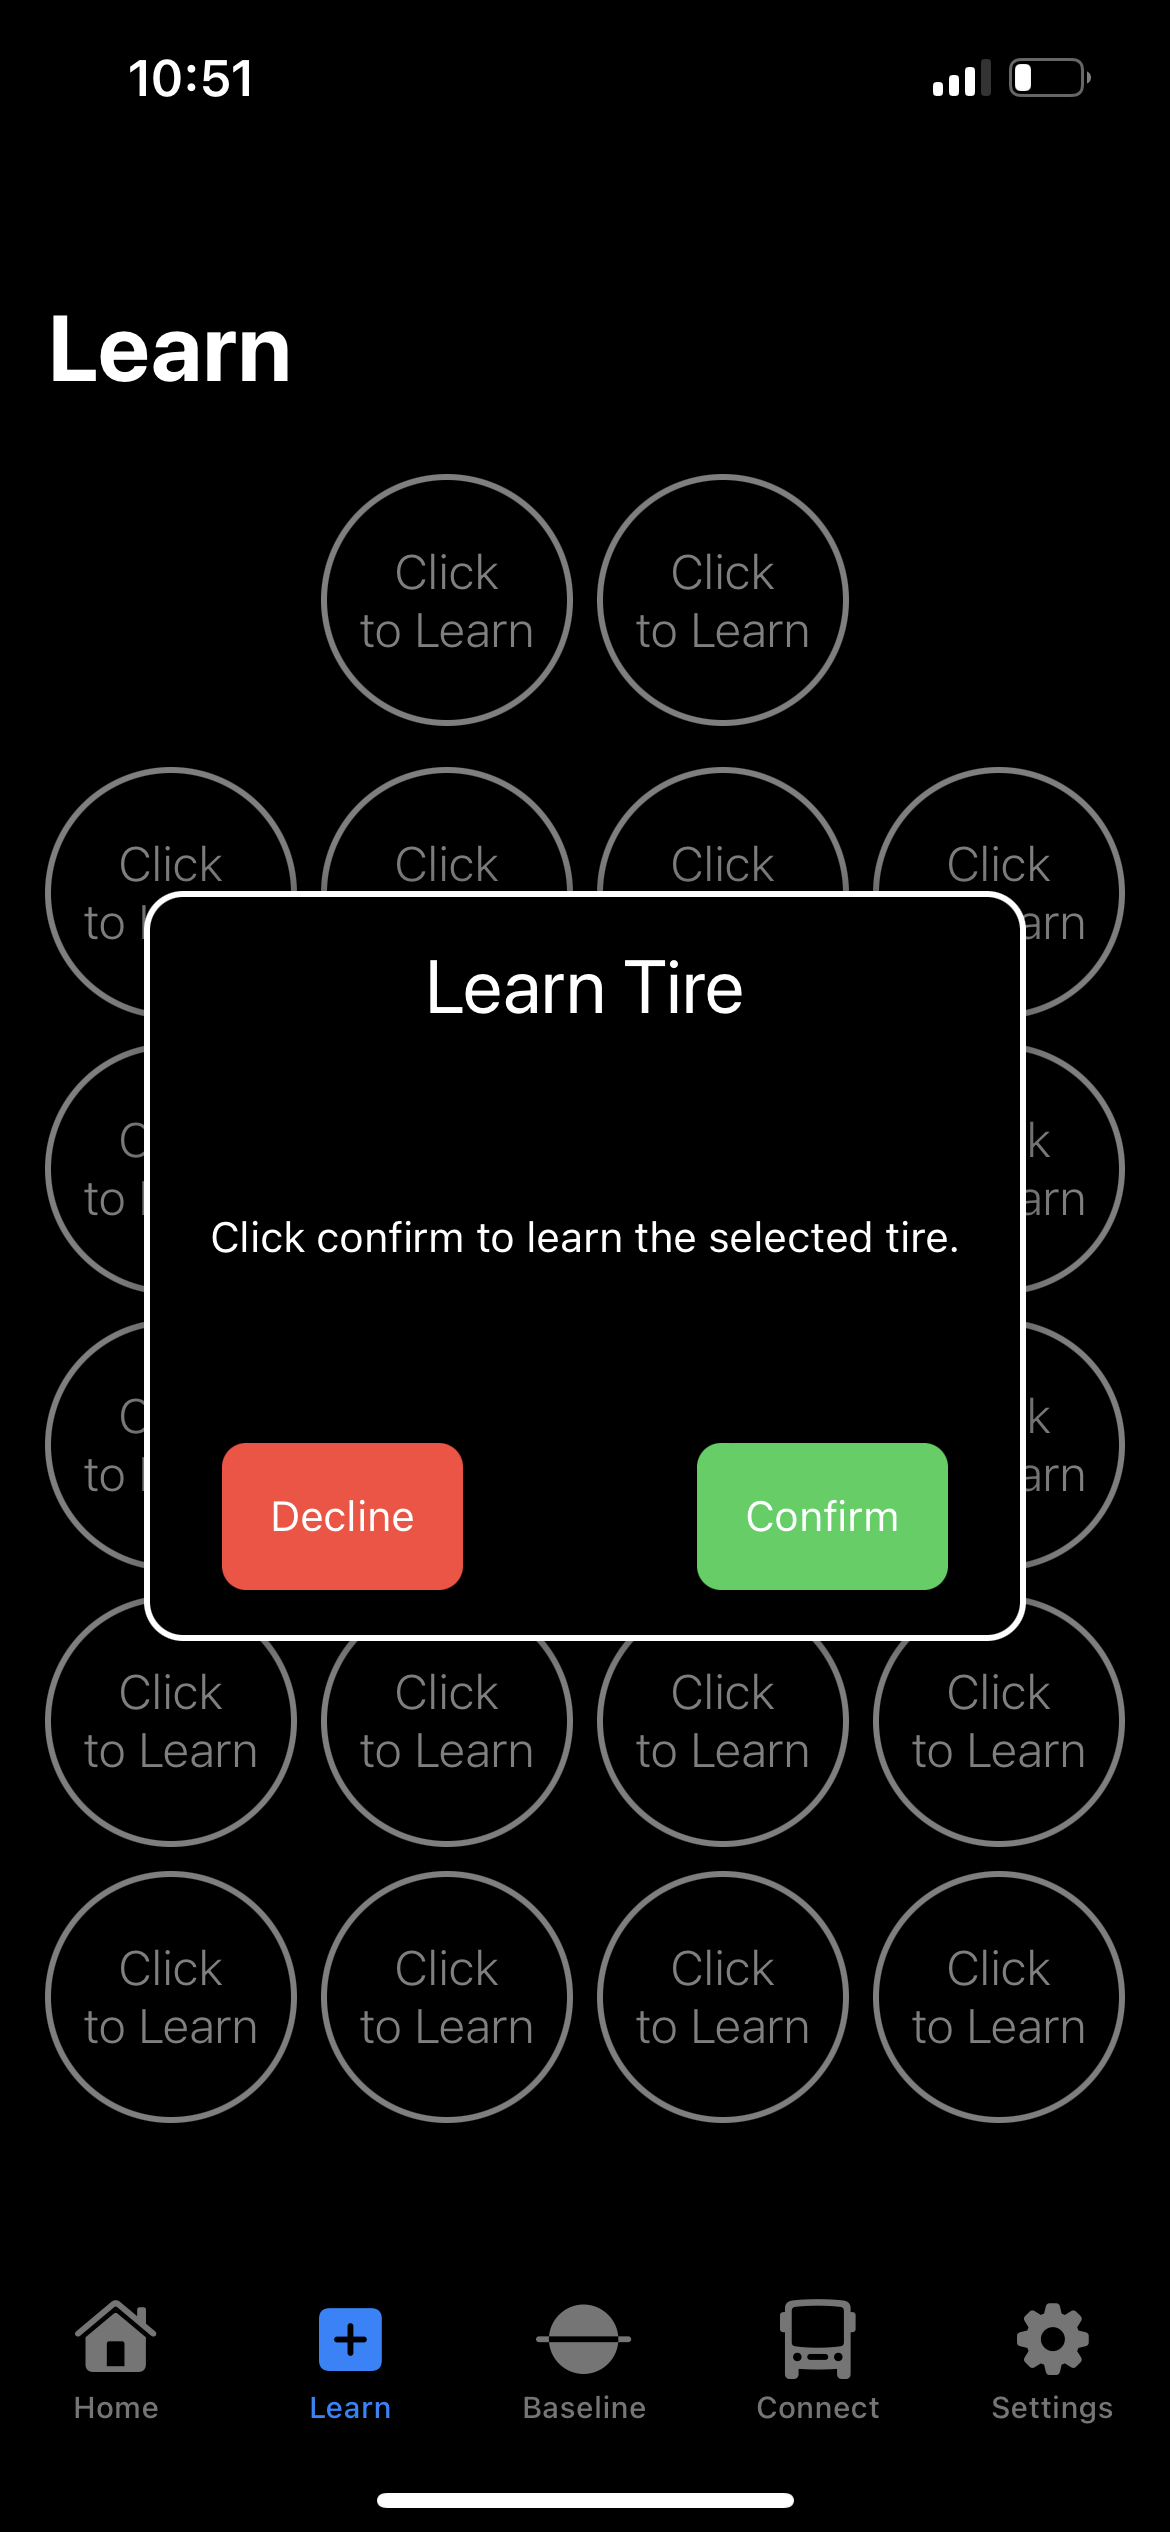
When the transmitter is learned, you'll see "Tire Learned" and you can move to the next tire until all transmitters are complete.
BASELINE MODE
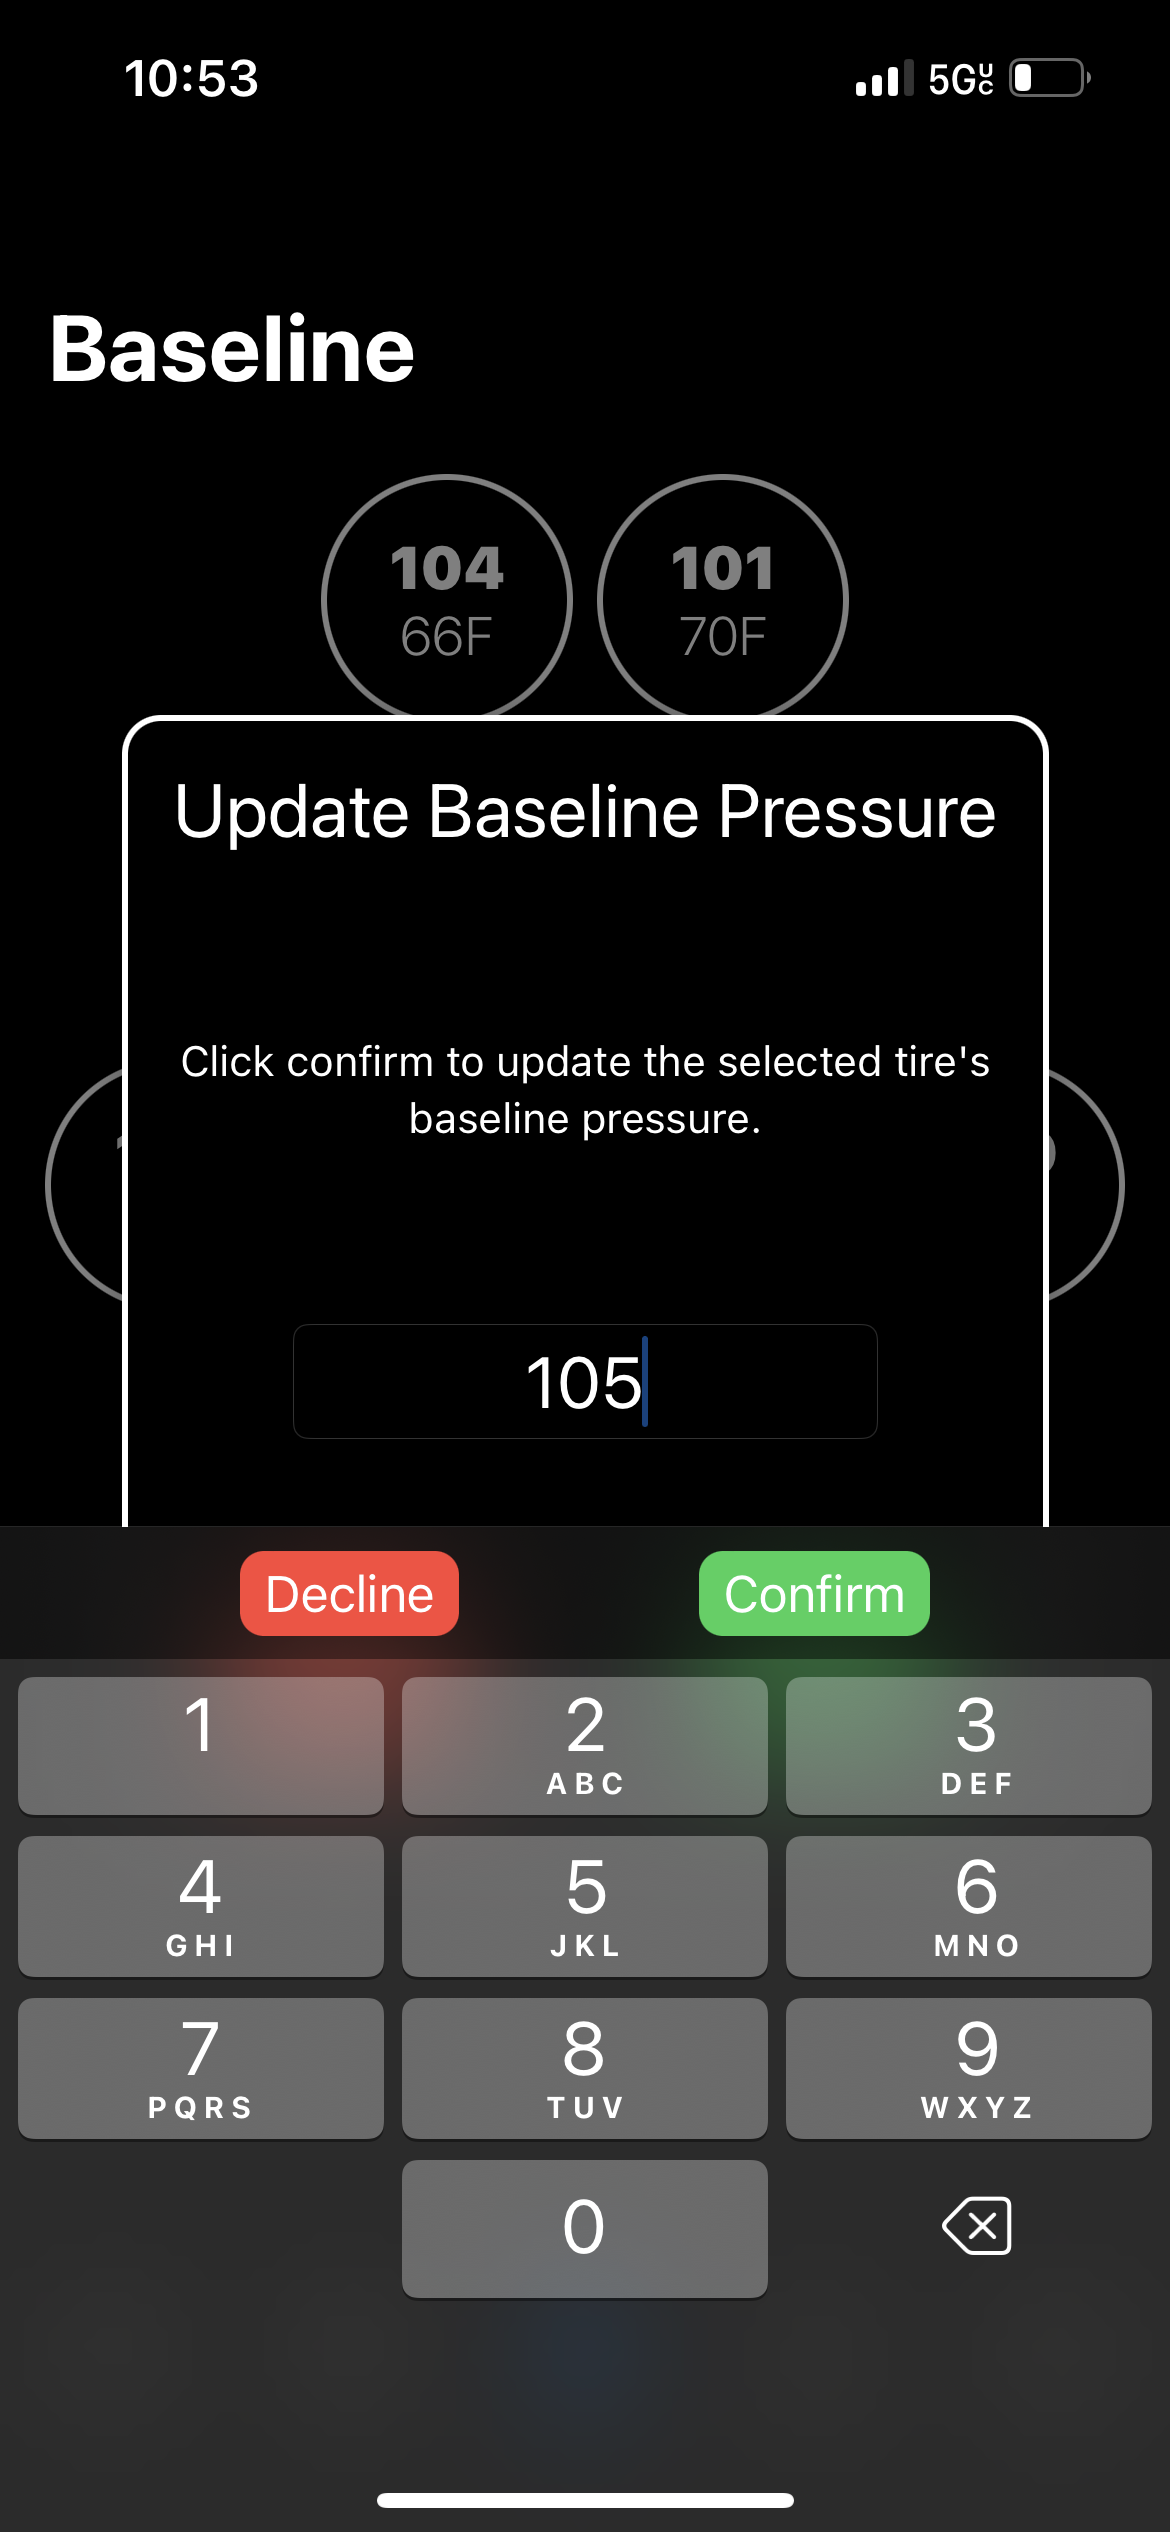
Baseline Mode is where you'll set the baseline pressures for your TireMinder transmitters. Your baseline pressure should be set to what you fill your tires to.

In this example, the tires are filled to 105 PSI, so each tire's baseline pressure should be adjusted to 105, as seen below. Your baseline pressure may also be adjusted at any time, to account for road or environmental conditions such as rain, extreme heat, and even elevation.
AUTO-SEARCH MODE
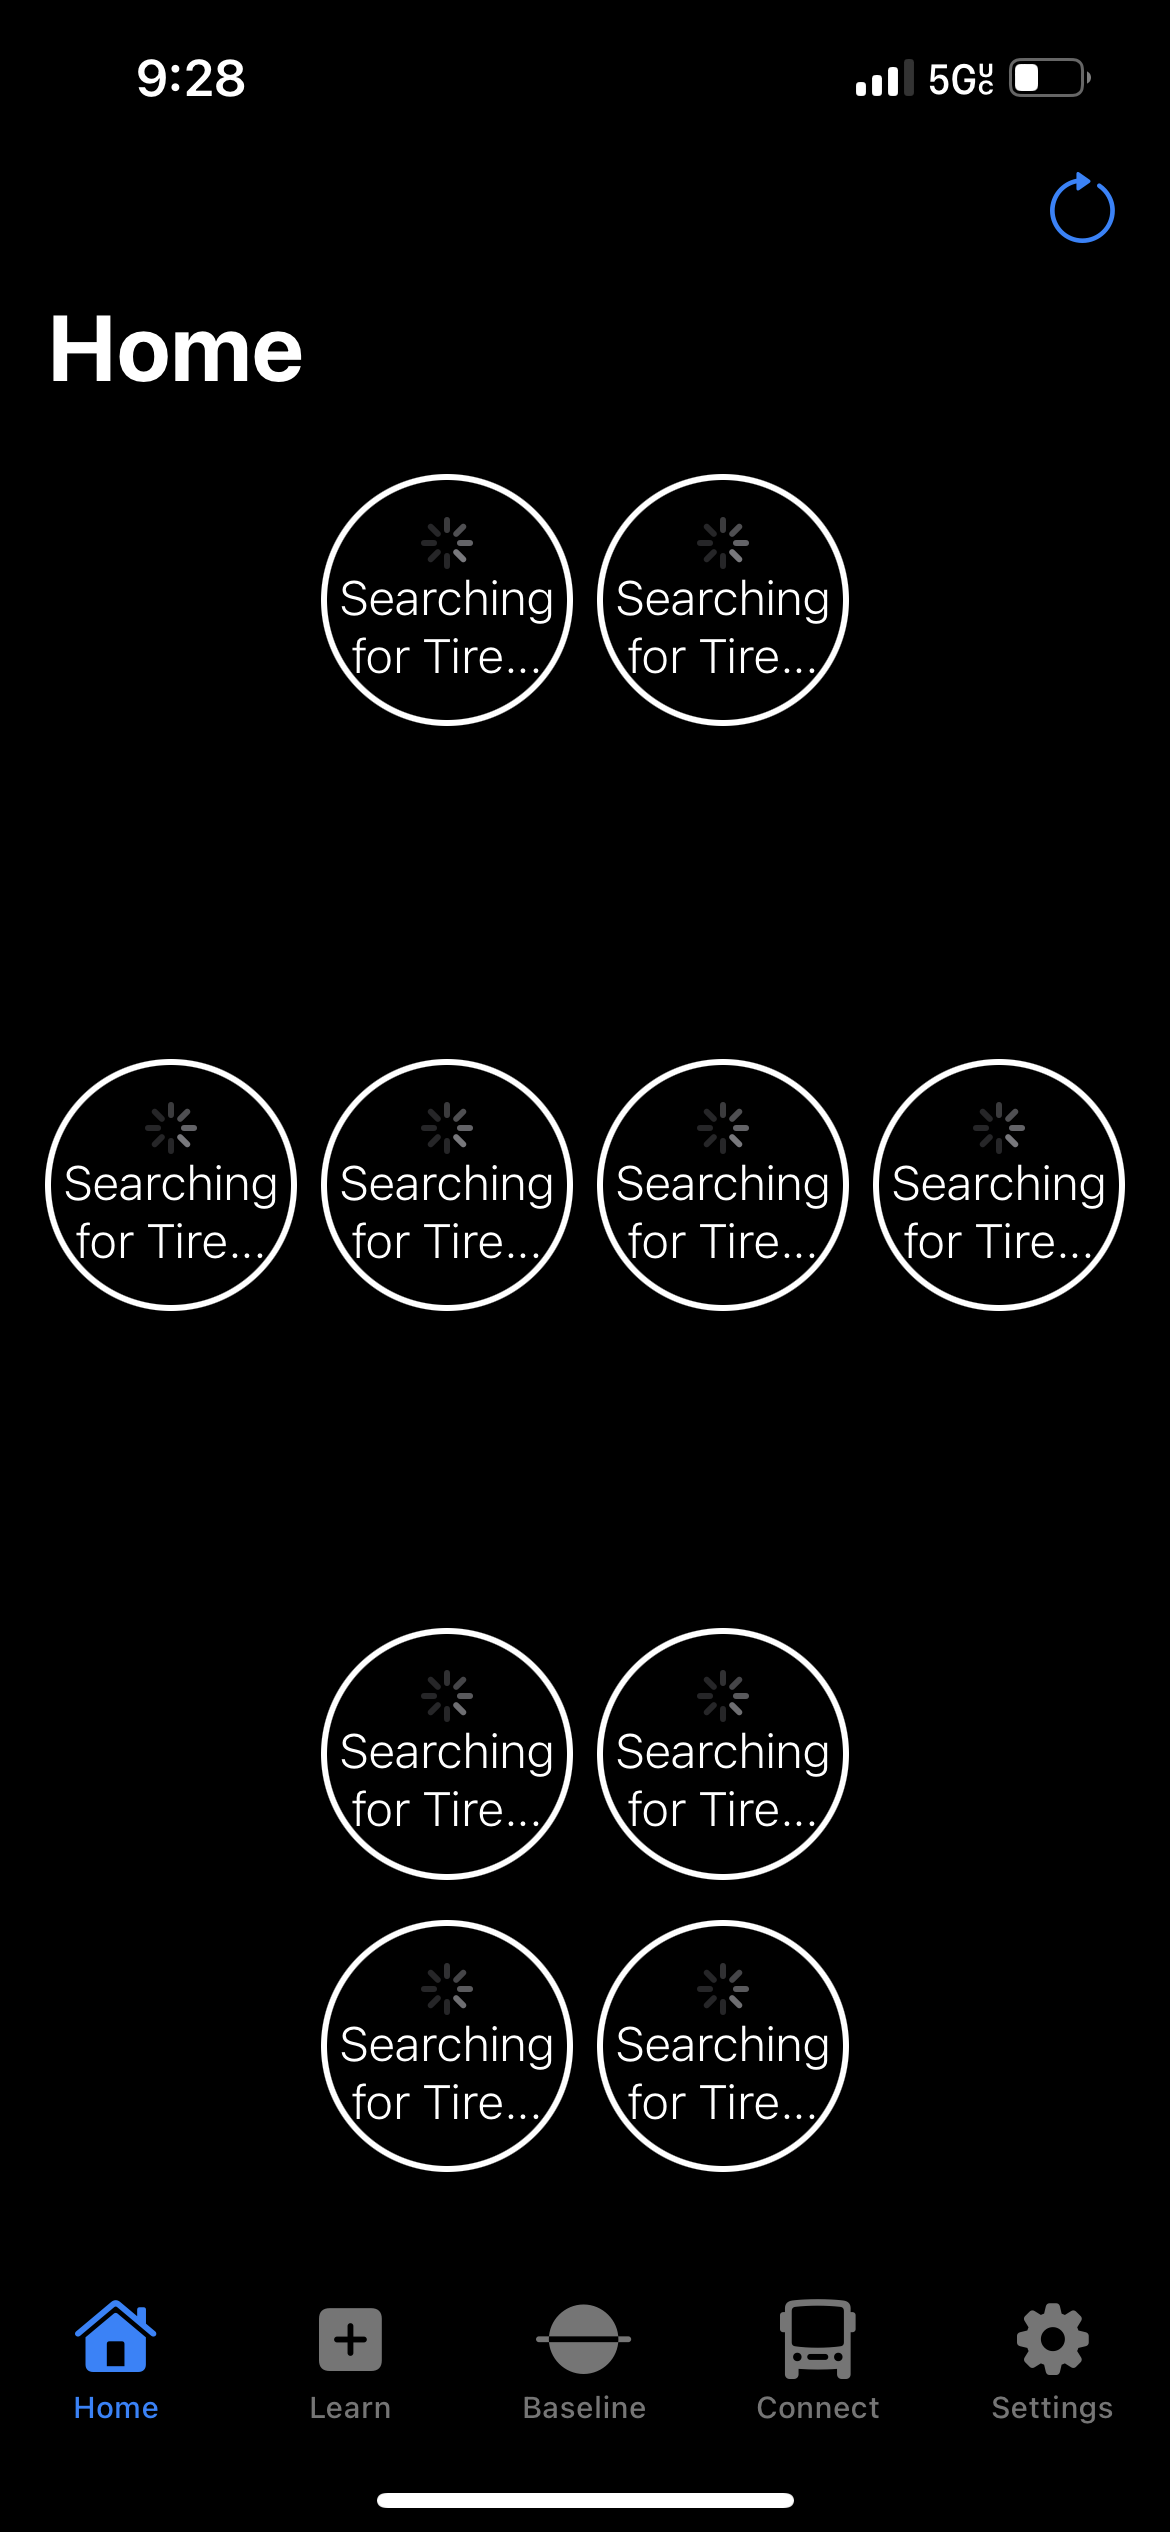
Auto-Search Mode will tell the Smart TPMS to reset all pressures to 0 PSI and temperatures to 32° F and will begin a search for the newest and most up-to-date information. You'll want to use Auto-Search Mode if your rig has been in storage for any amount of time, if you see Signal Loss, if you feel one or more position isn't updating, or even before you get back on the road after taking a break or in the morning before you begin departing.
After starting Auto-Search, the entire display will begin searching for new tire information and will look like the image below.
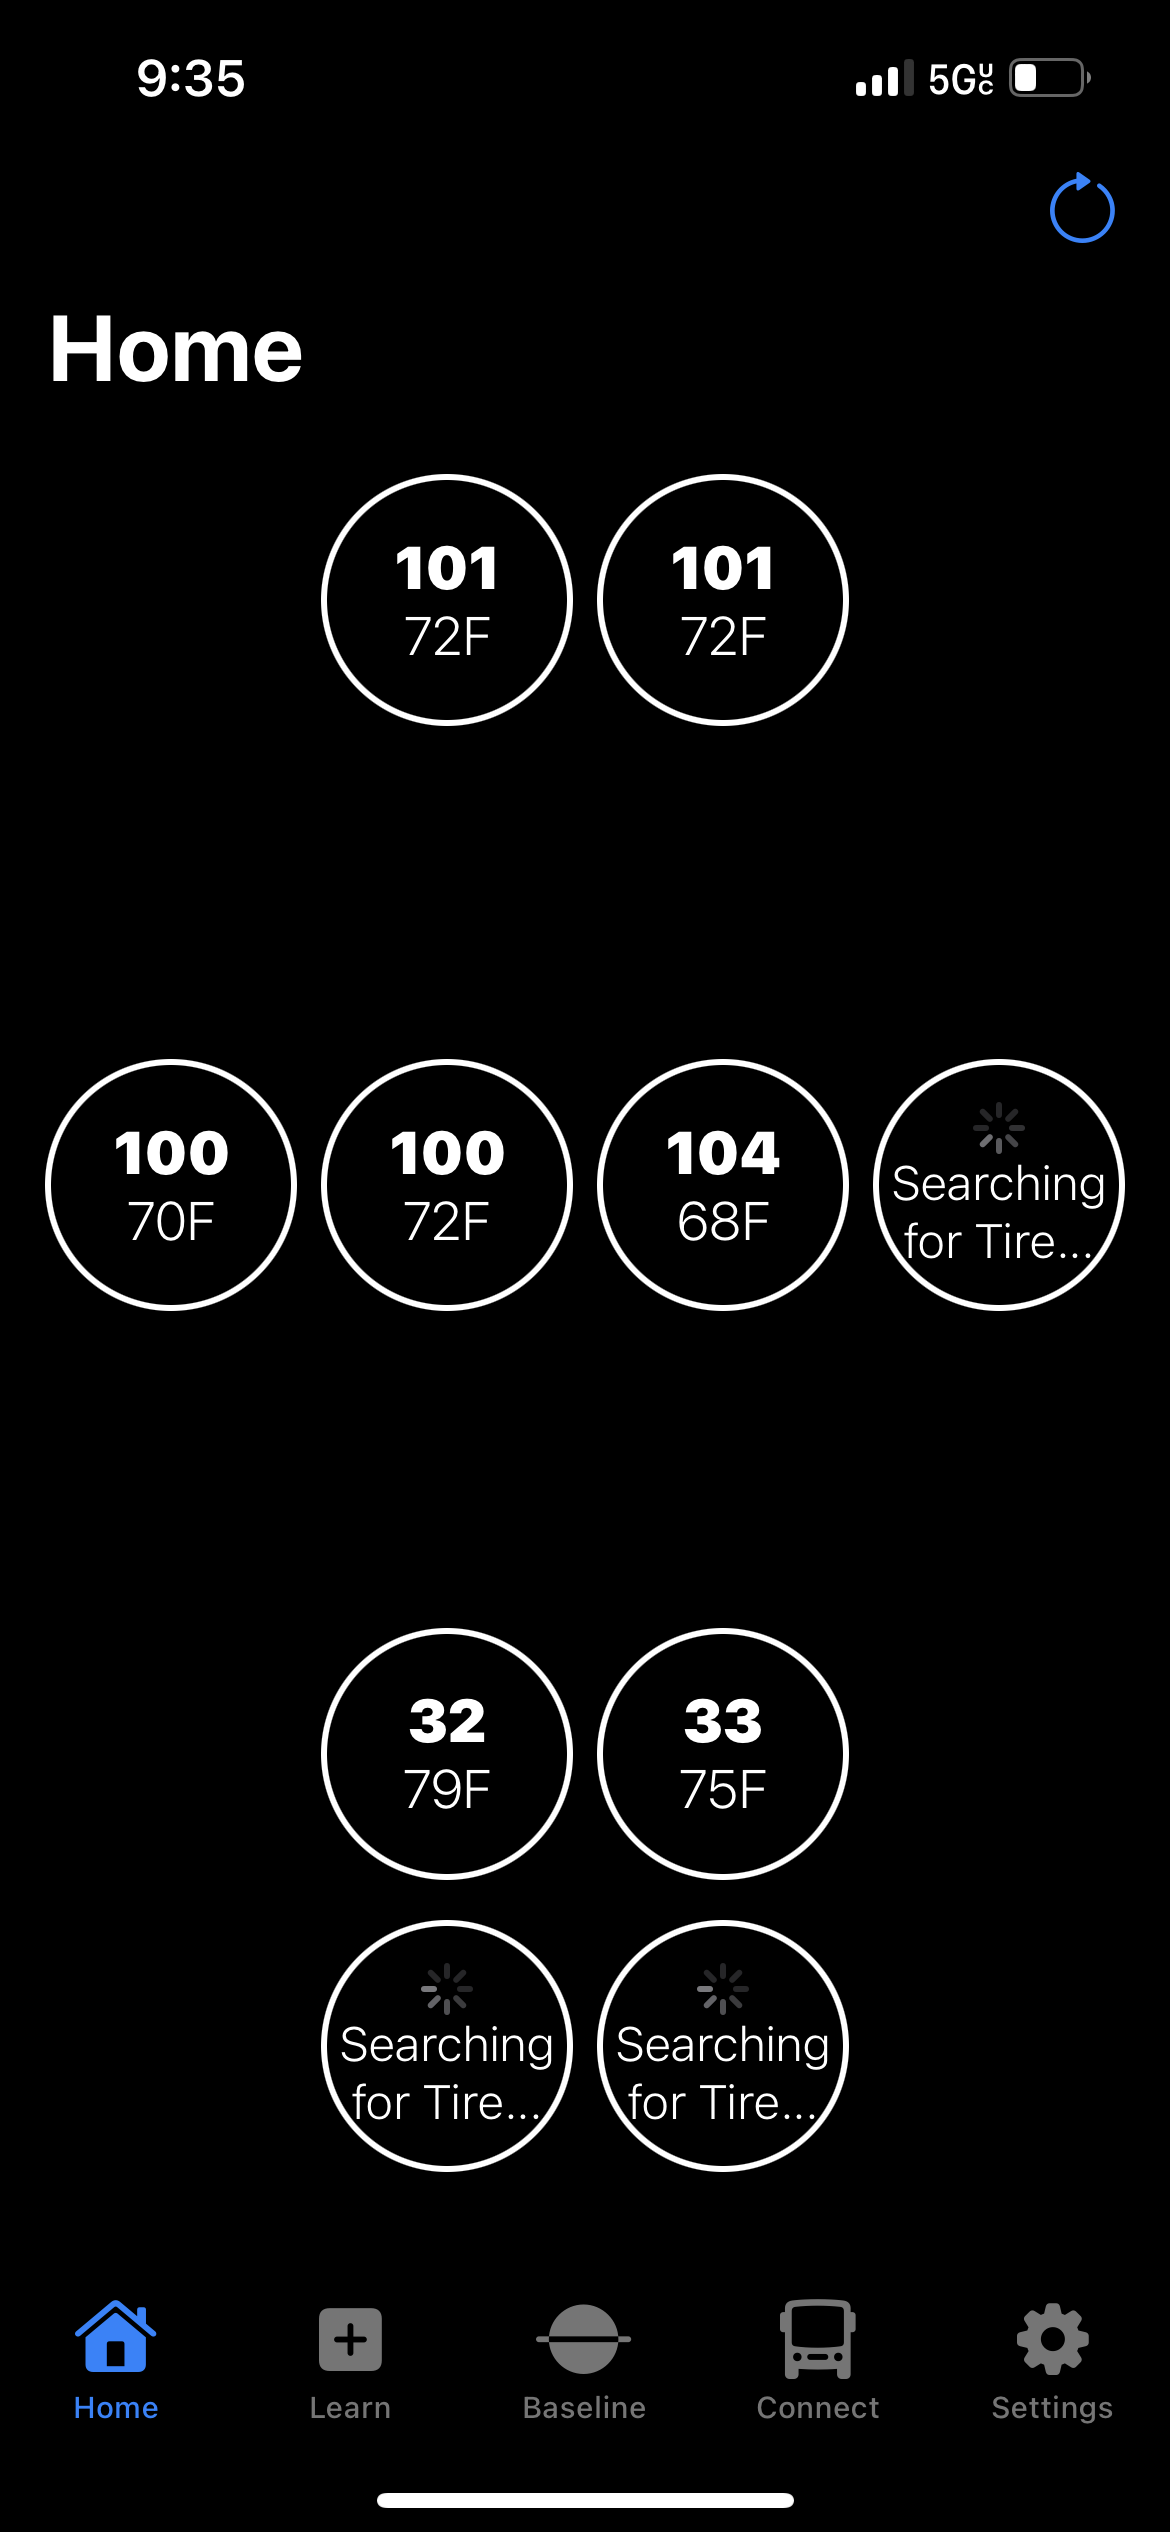
As transmitters begin to show updated information, the screen will change and show you which are still searching and which have been updated, as seen below.
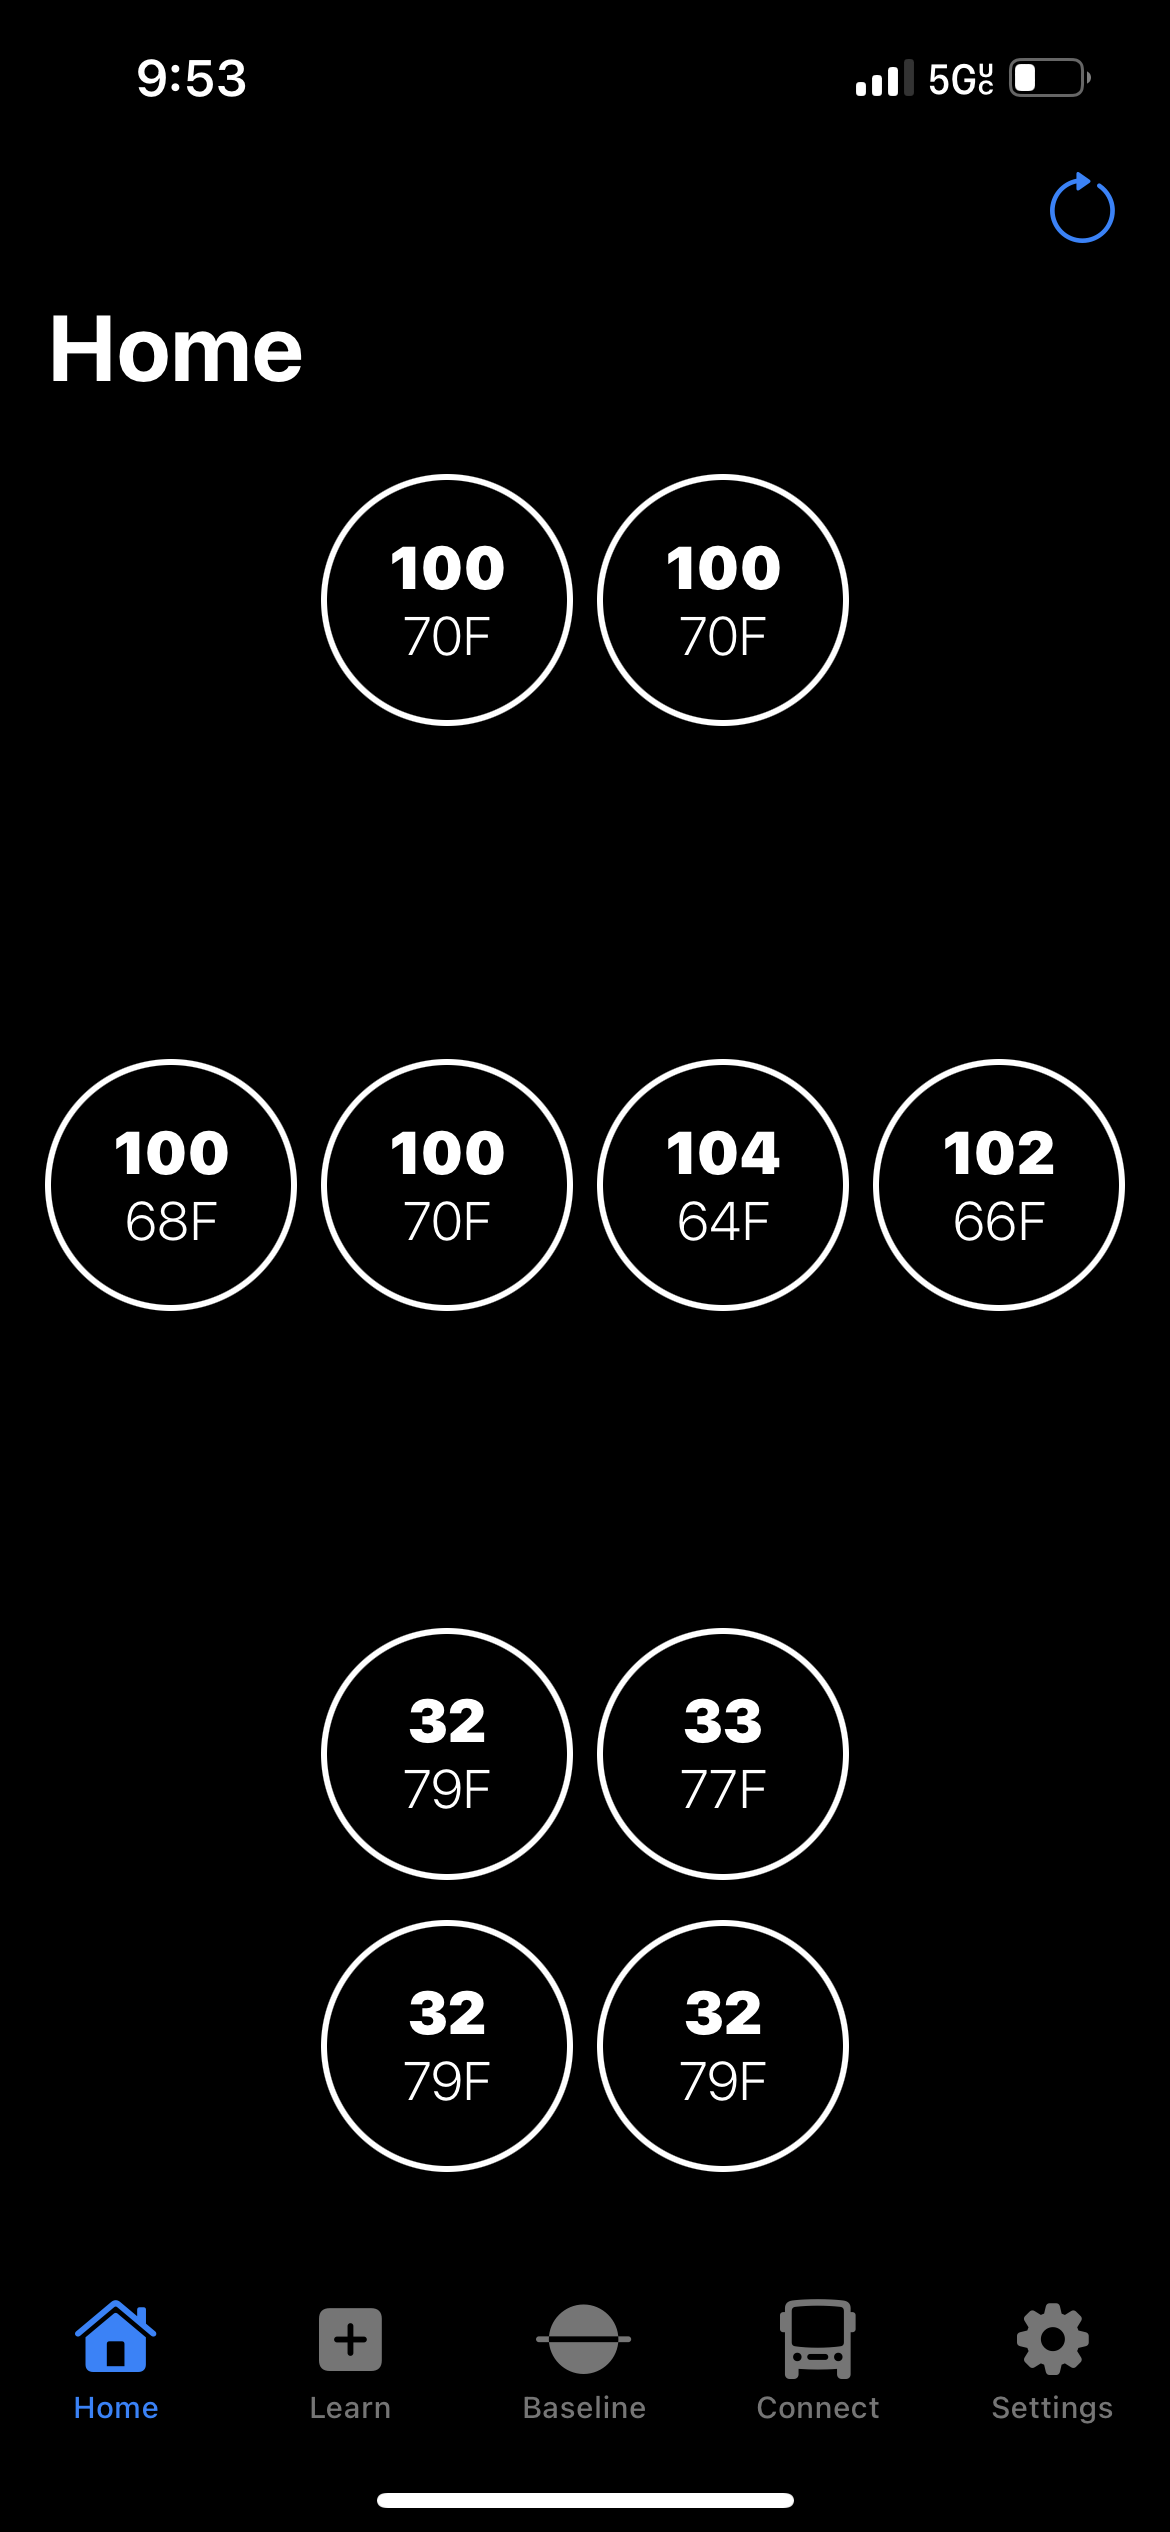
When the Auto-Search is complete, the screen will show all the information and will look as it does below.
SHOW LINE BETWEEN SECTIONS
This setting toggles the thin white division line between the Front and Rear sections on your TireMinder Lite App for iPhone and iPad. This helps more easily visualize the separation between the Front and Rear sections.
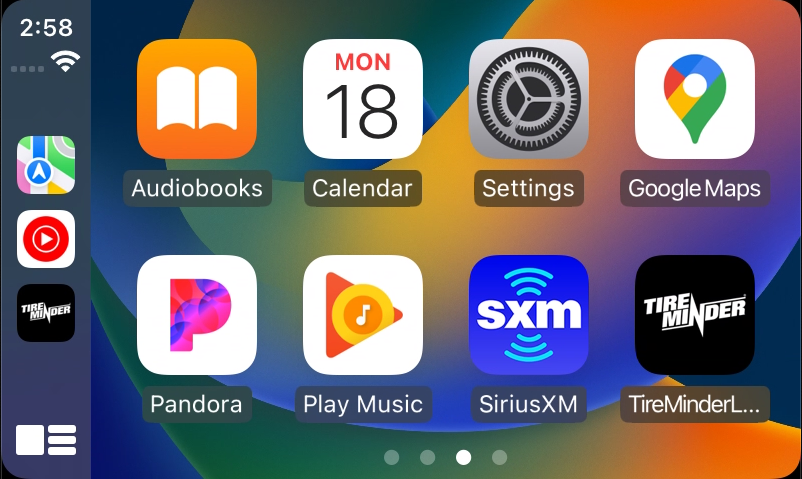
APPLE CARPLAY
The TireMinder Lite App officially supports Apple CarPlay. To utilize Apple CarPlay, please be sure you're using an iPhone or iPad with iOS/iPadOS version 16 or newer.
A compatible vehicle or 3rd party receiver is needed to be compatible with Apple CarPlay. A list of compatible vehicles can be found here: Apple.com | Compatible CarPlay Models.
- Install the TireMinder Lite App from the Apple App Store.
- Open the TireMinder Lite App and complete setup. See here for setup instructions. Please note: the app must be completely setup prior to using CarPlay.
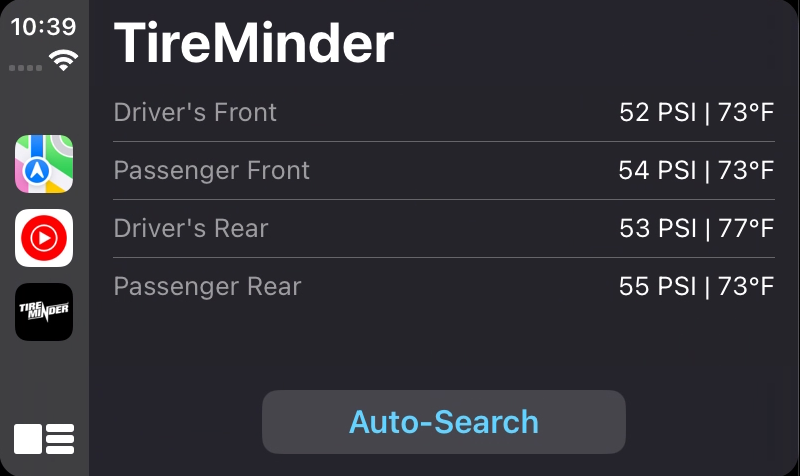
- Navigate to the App on your CarPlay system:
- Once open, you will now see the following display:
Additional setup instructions and further support for Android Auto can be found here: TireMinder Lite | Apple CarPlay Instructions and Support.
DELETE ALL TIRES
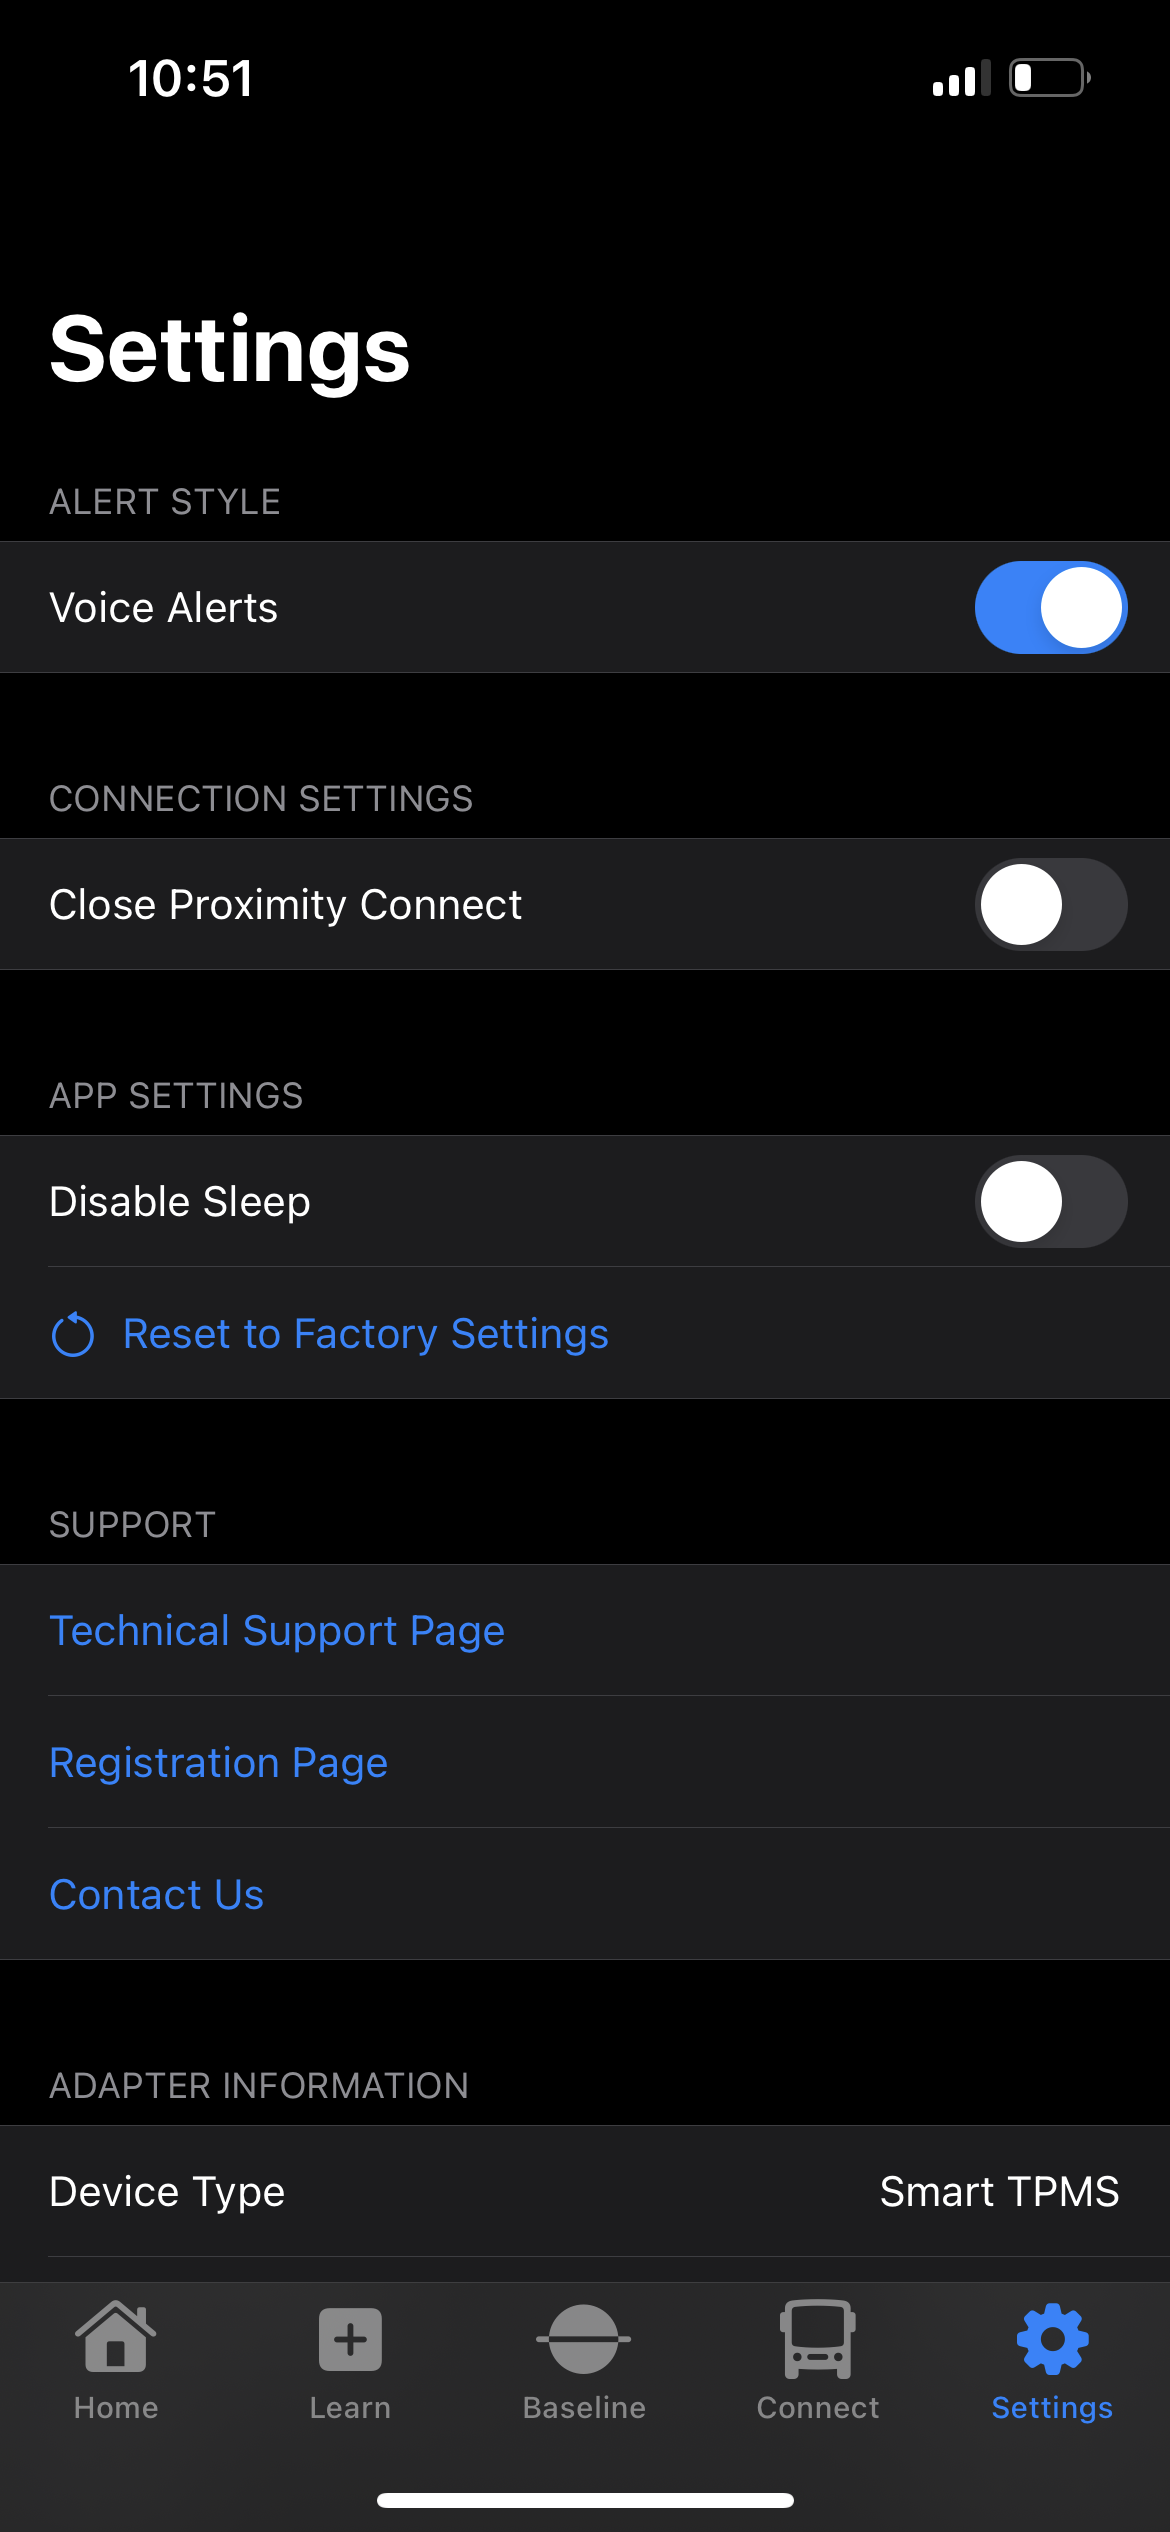
If you get mixed up during setup, or have removed your transmitters and forgotten which tire positions they go back onto and need to re-learn, you can quickly delete your transmitters and start over by going to the Settings section of your App and selecting "⟲ Delete All Tires. This setting deletes the tire positions only, and does not reset or delete any other information.
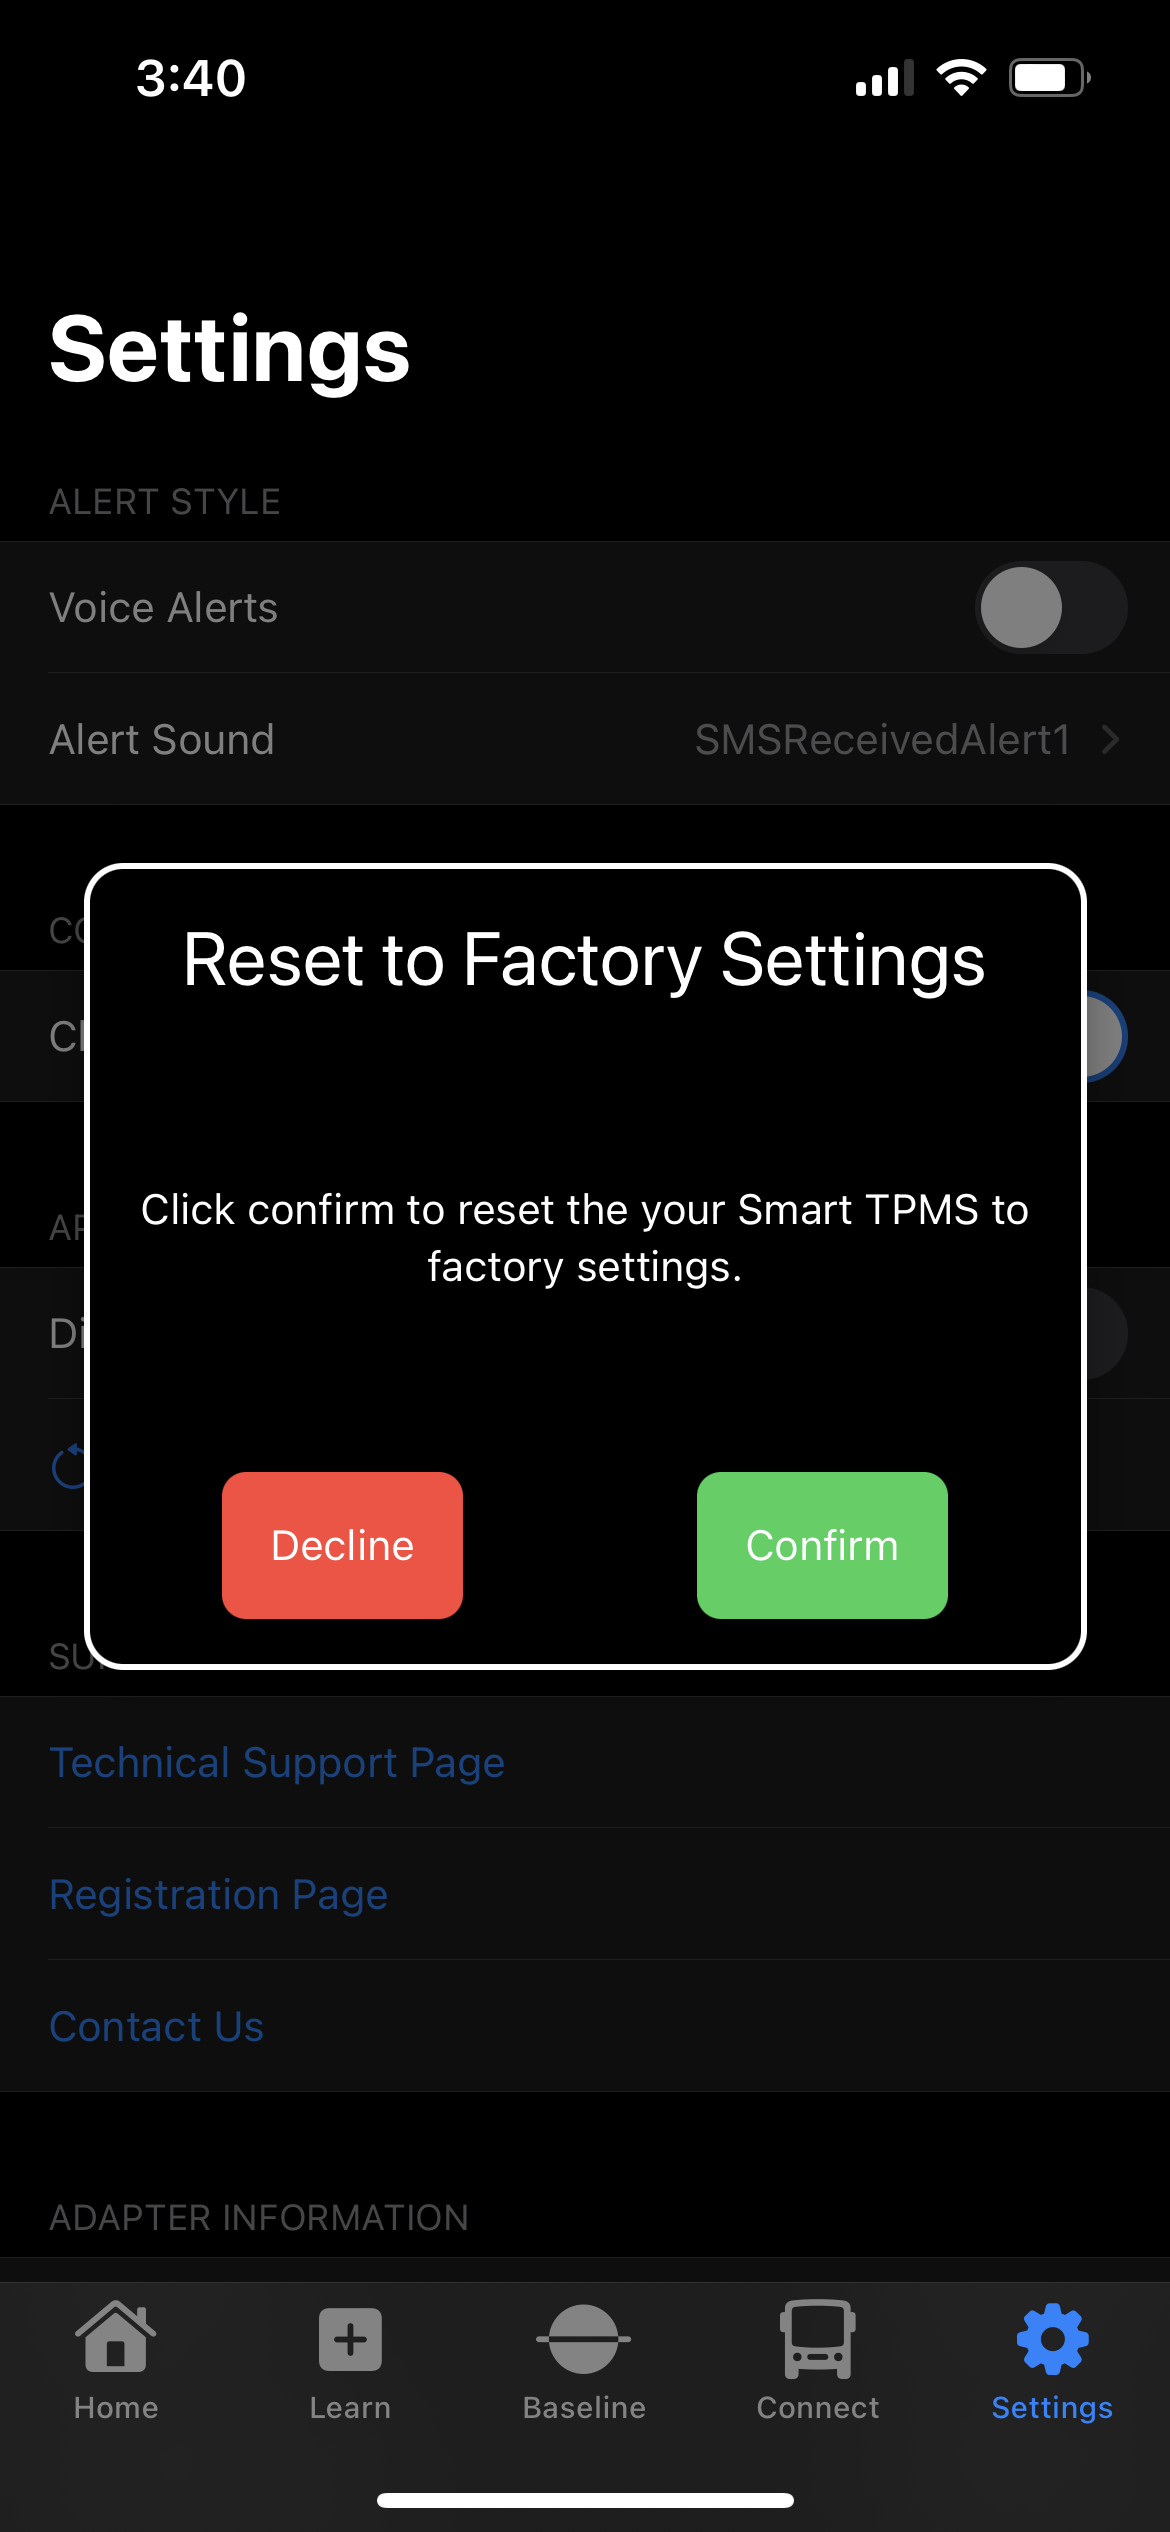
FACTORY RESET
If you experience issues with your TireMinder Lite App and wish to reset to factory settings, you can do this by going to the Settings section of your App and selecting " ⟲ Reset to Factory Settings." This setting will reset the TireMinder App and all settings back to their factory defaults, including any changes made to Voice Alerts, Disable Sleep, Show Lines Between Sections, and Driver's Side First settings.
You will be asked to Decline or Confirm before the action is complete, as seen below.
DRIVER'S SIDE FIRST
This setting is for CarPlay users who are monitoring their Smart TPMS through their infotainment system. When this setting is enabled, it will show the Driver's Front and Driver's Rear first, followed by the Passenger Front and Passenger Rear.
ADDITIONAL INFORMATION

Minder Division of Valterra Products
3000 SE Waaler Street
Stuart, FL 34997
Was this article helpful?
That’s Great!
Thank you for your feedback
Sorry! We couldn't be helpful
Thank you for your feedback
Feedback sent
We appreciate your effort and will try to fix the article